 |
| starfruit with human face |
do know how to make it?
do as I do. ship ... ... ..
1 download images starfruit and the person
can be downloaded here for starfruit and here for people
2 star fruit and drop the image into photoshop
just click and drag

3 nah do is like in the picture below
starfruit as the background and the people as a layer 1
adjust the opacity of the layer 1 (one) to 30%
large set of scale drawings
adjust the position as follows

4 now we will do is remove the areas that are not needed
eyes, nose, mouth, do not delete it. whatever you want to delete them with what
but I remove it with a layer mask, can be seen in the picture below
set layer1 (people) then
click the layer mask and activate the brush tool (take a round brush smooth)
black color and then take the brush to the face to eliminate the area.

5. Layer 1 duplicate (ctrl + j) then set coloring
on Layer 1 copy now set the Color Balance (Image> Adjustments> Color Balance) or with the shortcut ctrl + Bset as in the picturecolor level = -40, 100, -40


6. on Layer 1 copy set the color hue using the hue / saturationImage> Adjustments> Hue / Saturation or Ctrl + Ucheck the colorize thenhue = 80saturation = 40lightness = 0

7. on Layer 1 copy remove the eyes, nostrils, and mouthie as in a way no 3Masking is a way to use Click on the Add Layer Mask at the bottom right corner of the box-shaped roundthen click the smooth round brush (soft round) and then select the black color on the foreground color setclick the area to be removed

8. now go to layer 1click Layer 1 and then click Image> Adjustments> Levels or Ctrl + Lset as in the picturein the

red = 0 | 12:40 | 255

on the green = 0 | 1.60 | 255

on the blue = 0 | 12:25 | 255
click ok
9. trim Layer 1 and Layer 1 copy to each person using the masking of the face=> Remove the parts that are not needed

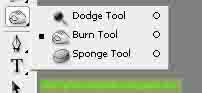
10. now use the burn tool to sharpen the contours of the face
do like in the picture

11) now in the Backgound we duplicate the way ctrl + j to produce a copy of the Backgroundon the Background Copy set to overlay blendingnya
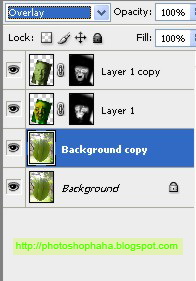
completed
note: in this tutorial section staining sangatah important, you can adjust the color as needed.
to increase knowledge sharing let us, leave a comment below.thanks